
Laser Show From CD Stepper Motors

I’ve always had a fascination with lasers and especially laser shows. Laser gear can be rather expensive, especially galvos (Galvanometers) that move the mirrors that could cost over $1k. After some research online I stumbled upon the archived Fred Sena project. So, this is my take on his project.
I did this project some time ago so this is a repost as I find it extremely interesting and there is not much information about this technique for making and controlling cheap laser galvos.
This project uses 2 steppers from CD ROM drives, an amplifier, an LM317 constant voltage limiter, and a red laser pointer:
TDA7297 amplifier - a 15W overkill but it's what I had
LM317 fan speed controller - also had this lying around and conveniently has connections for two fans. This is not ideal as it allows for coils to heat up and could burn out if used for a longer time. An LM317 set up as a current limiter would be preferred and is used as such in the original Fred Sena project
Laser pointer - any will do but more powerful more visible, and more dangerous. Use Laser safety procedures. Consider yourself warned
CD steppers FREE, dismantle preferably two identical CD ROM drives
Scanner mirrors FREE from the dismantled scanner
Unlike common projects found on the net which use HDD heads as actuators that need some kind of mechanism to reset it to the middle, usually a rubber band, this setup doesn't need it and is more precise. That was actually my first attempt at creating a laser show but was not satisfied with the responsiveness and it was very dependant on the rubber band.
It works by energizing one set of coils by constant voltage (should be current) using LM317 and varying the other set with an audio amplifier. The energized set of coils acts like the aforementioned rubber band and we can vary the K factor, or how elastic the rubber band is.

Common CD ROM steppers have a very small number of steps per revolution, some as low as 14 steps or around 25 deg per step. Here, the lower the resolution the better and wider the arc we can point our laser to. By energizing both sets of coils the stepper shaft is set to the middle of its step range and has about 9 to 12 deg wiggle room both ways.

CD steppers have 4 pins. Use a multimeter in continuity mode to find which pins are paired. On one CD stepper connect one pair to the Left channel on the amplifier. Repeat on other CD stepper but connect it to Right channel.
You are now left with one set of unused pins on both CD steppers. Connect them to LM317. The one used has two output terminals but you can use two LM317 for better control over the CD steppers. So you could vary the elasticity of individual CD steppers. The setup used here sets both CD steppers to some elasticity. The polarity is not that important.
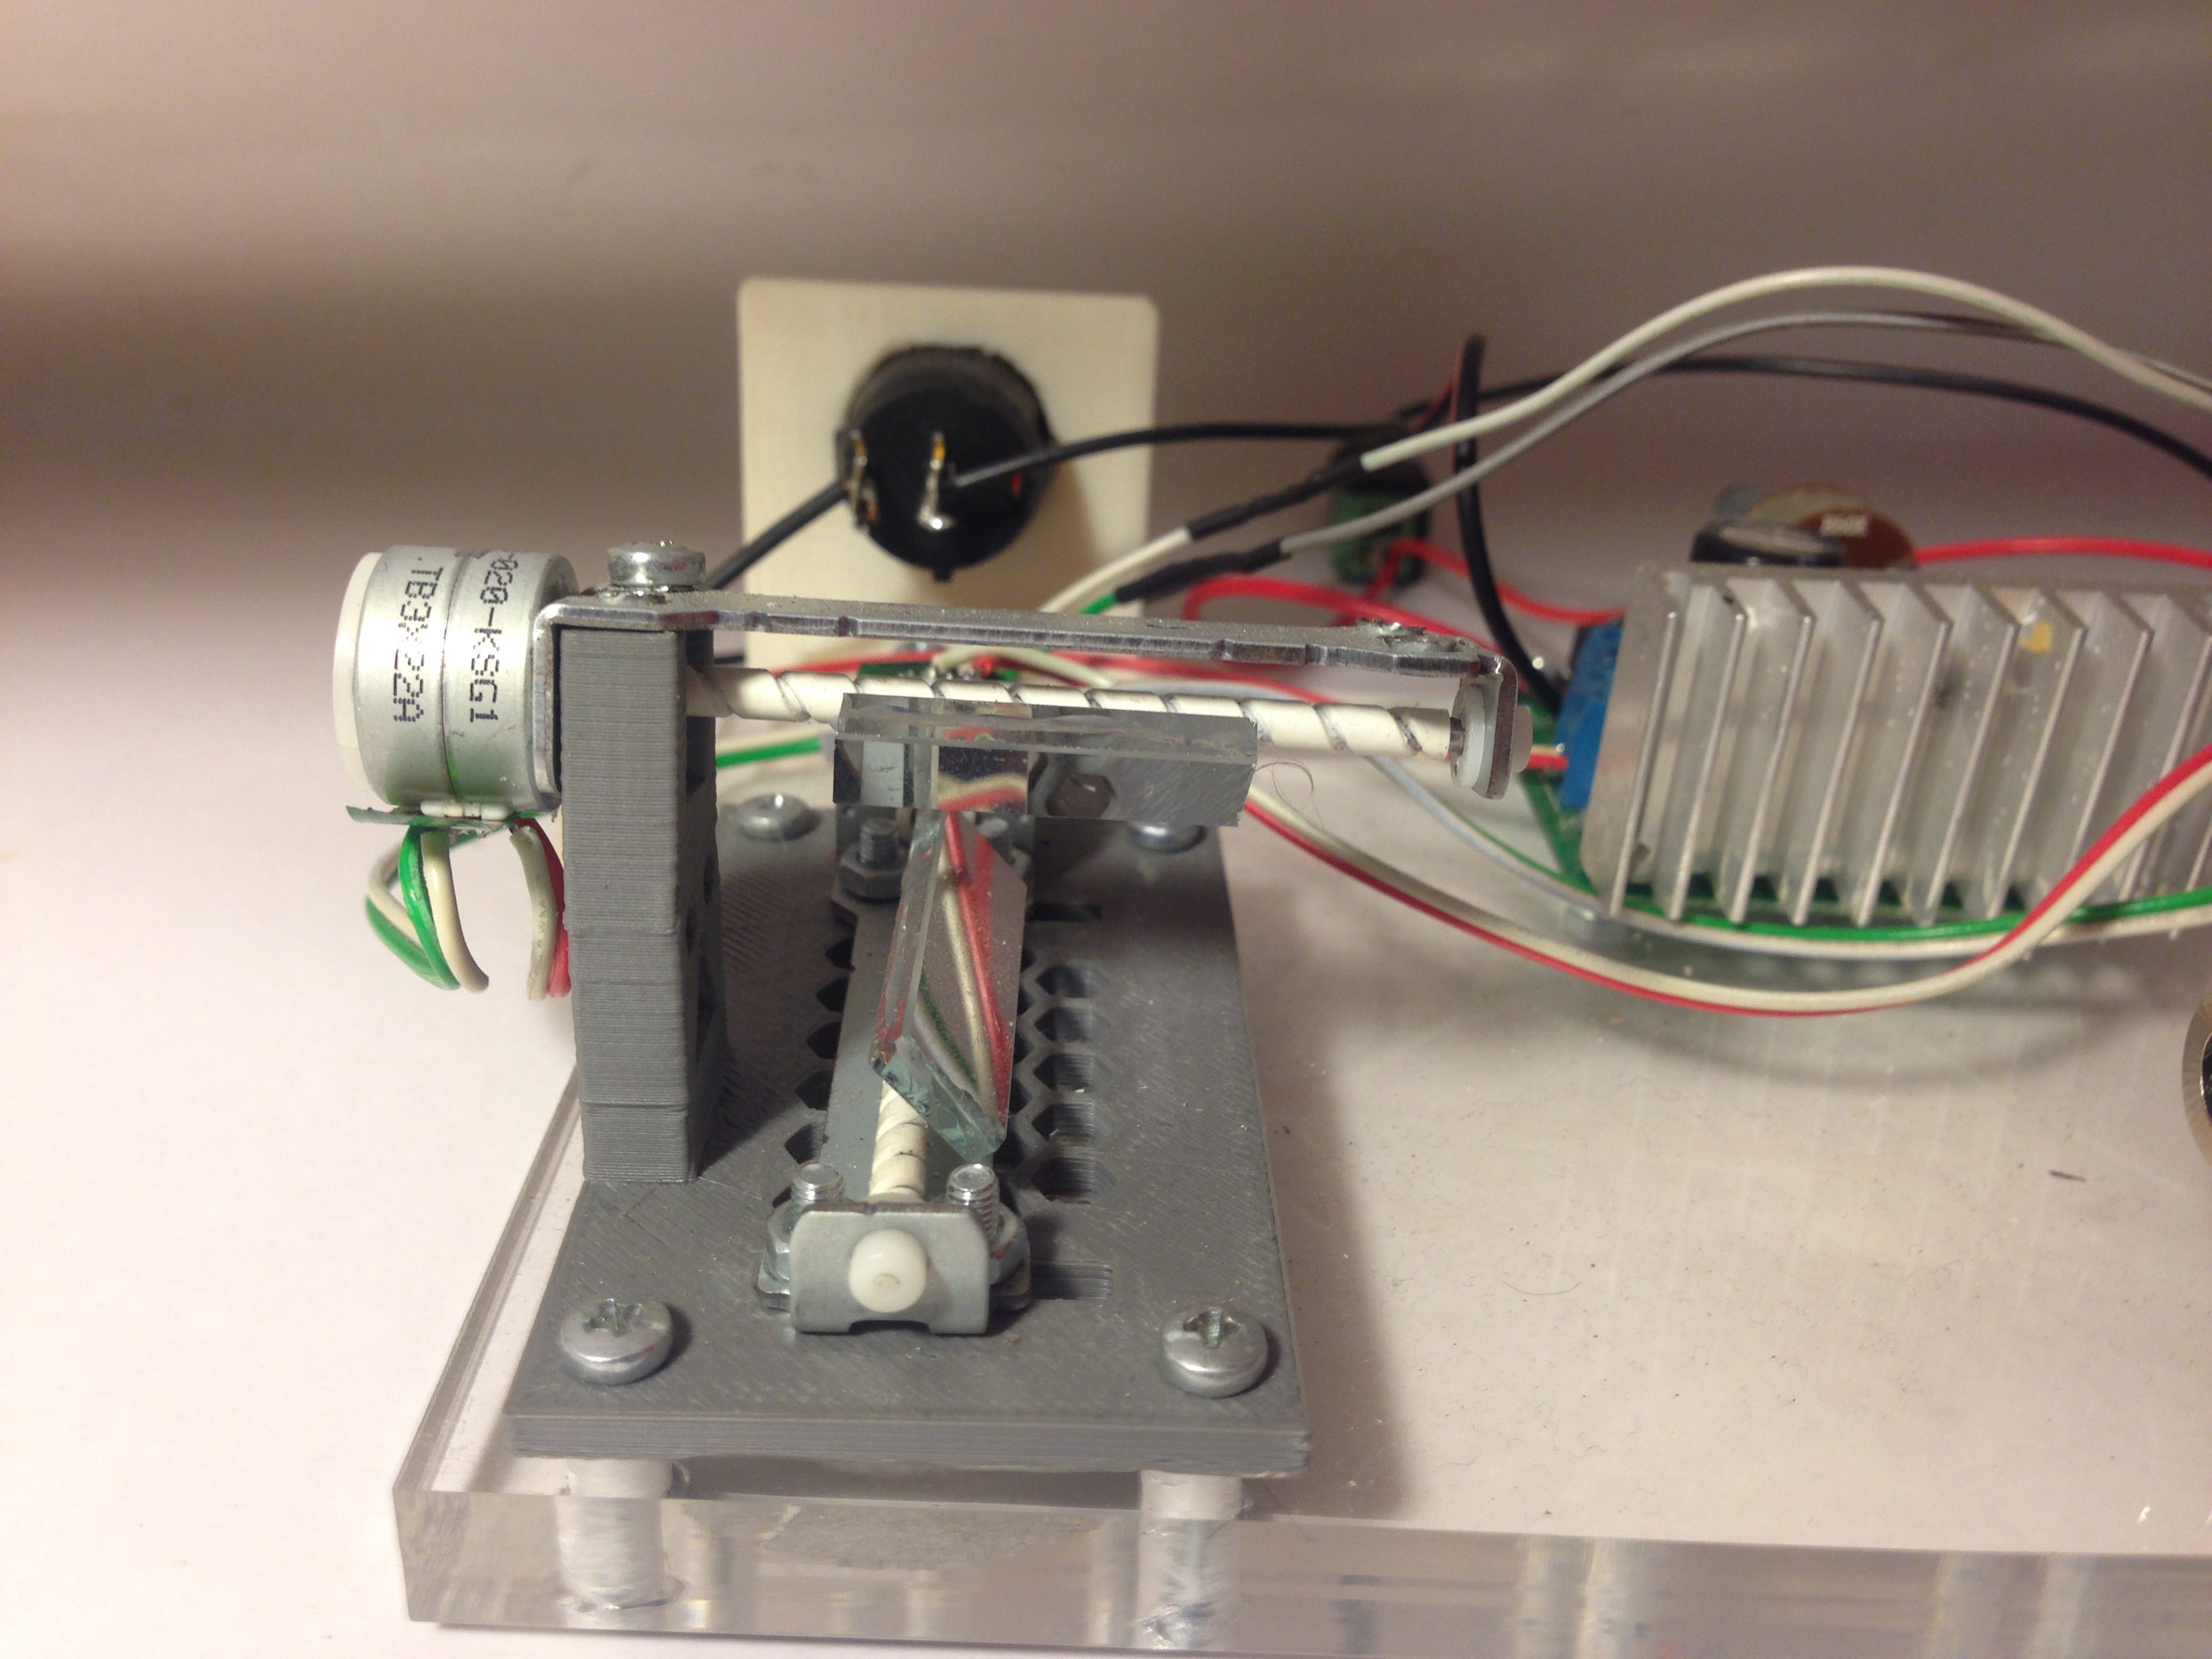
Holder for steppers can be found on Sketchfab. It enables you to attach CD steppers in the proper orientation.
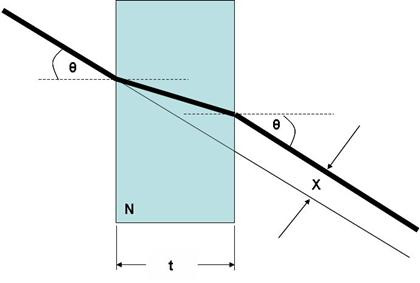
Now, mirrors are from an old scanner. This is somewhat important as normal mirrors can be used but they have the mirrored surface behind the glass and the laser beam refracts and as the mirror moves it smudges the beam.
The scanner mirror has a mirror surface in front of the glass and has no such issue.
Cut mirrors to size.
Before hot gluing the mirrors power everything up with a 5V power supply (excluding the laser) and connect the amplifier to the sound source. Place a piece of sticky tape as flags on the CD steppers instead of mirrors to see in what orientation they are and try to make them at 45 deg and 90 deg to each other. Once satisfied hot glue the mirrors and cautiously power up the laser to check your work. Use laser safety glasses while doing this. And that is it.
Use line out from computer as input to the amplifier.
With music playing turn on the LM317 board, laser, and slowly increase the volume until you see the laser dot moving. Make sure that the amplifier is started turned almost completely down as 15W it can deliver is way too much for Cdrom stepper to survive and they could burn out.
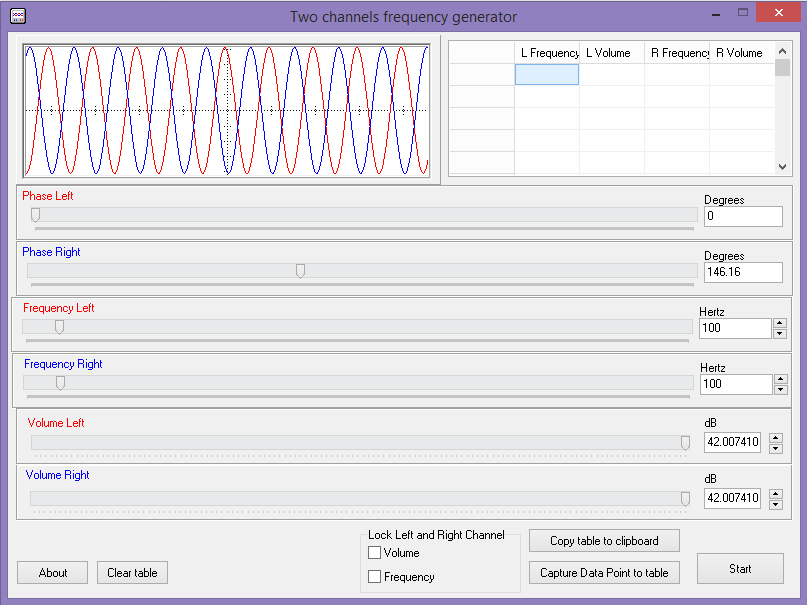
For more control over the laser, you could use Two Channels Frequency Generator v.1.2.
Decrease frequency to 100 Hz on both channels and increase the volume. Play around with Phases for both channels to get nice patterns. This will produce deep sounds and I would suggest lowering your volume on speakers.
Now, this project is no replacement for the high response rate of professional or even consumer galvos but is a fun project in its self. I do plan on creating an updated version of this with all proper components but life keeps getting in the way.
If you have a laser show already try passing it Jerobeam Fenderson music as stereo to x / y axis. If you play it as such you will see that the music is actually comprised of images.
So Cool !